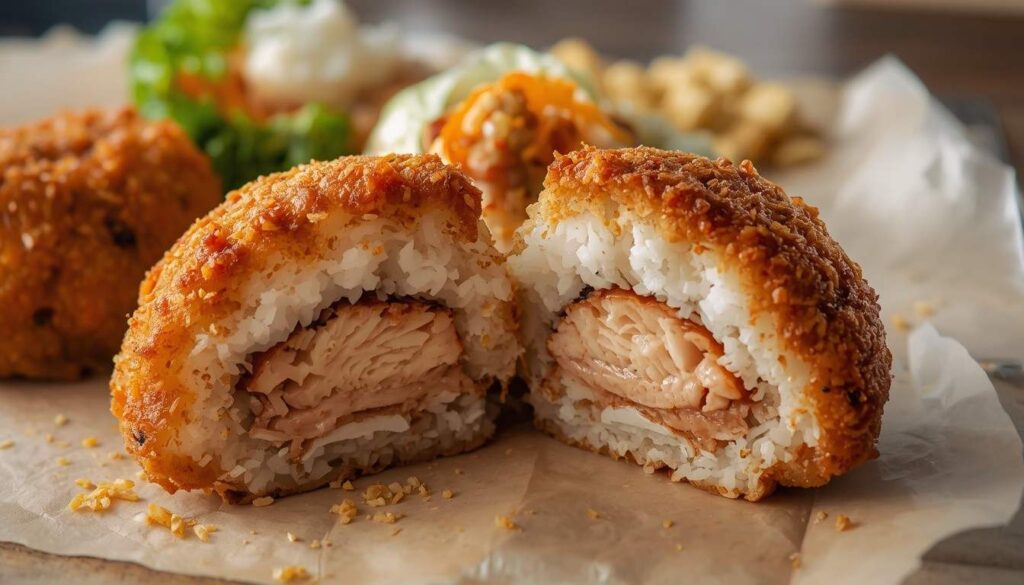

There’s a reason chicken katsu musubi disappears the second it hits a picnic table. It’s a warm block of seasoned rice, wrapped in a crisp sheet of nori, sitting under a slab of golden, crunchy chicken katsu that’s been drizzled with something sweet and a little tangy. One bite gives you that contrast I chase in almost every recipe I develop: soft against crunchy, savory against sweet, plain rice grounding a piece of chicken that’s anything but plain.
If you’ve never had musubi before, think of it as Hawaii’s answer to a sandwich, built on rice instead of bread, and chicken katsu musubi is the version that turns heads because the chicken is fried to order, still audibly crackling when you slice into it. It smells like a good izakaya on a Friday night, panko toasting in hot oil, garlic and soy simmering down into a glaze. Once you make it at home, the drive-through katsu place stops feeling necessary.
You’ll Love Chicken Katsu Musubi
Most musubi recipes online treat the chicken as an afterthought, a generic cutlet slapped on rice. This version treats the katsu itself as the star. I double-dredge the chicken so the panko crust holds up even after it’s sliced and stacked, which matters because a soggy crust is the single biggest complaint I see in musubi recipes that skip this step.
The rice is seasoned lightly with rice vinegar and a touch of sugar, closer to sushi rice than plain steamed rice, so it doesn’t taste flat next to the bold chicken. And instead of a bottled katsu sauce, I build a quick glaze from soy sauce, mirin, and a spoon of ketchup, which gives it that deep reddish-brown color and rounded sweetness without an hour of simmering. It’s a home-cook shortcut that still tastes like it came from a restaurant kitchen.
Ingredients & Substitutions
For the Chicken Katsu
| Ingredient | Quantity |
| Boneless chicken breast | 1 lb (450g) |
| Salt and black pepper | 1/2 tsp each |
| All-purpose flour | 1/2 cup |
| Eggs, beaten | 2 large |
| Panko breadcrumbs | 1.5 cups |
| Neutral oil, for frying | As needed |

For the Rice and Assembly
| Ingredient | Quantity |
| Short-grain sushi rice | 2 cups (uncooked) |
| Rice vinegar | 2 tbsp |
| Sugar | 1 tbsp |
| Nori sheets | 4 sheets, halved |
| Soy sauce | 3 tbsp |
| Mirin | 2 tbsp |
| Ketchup | 1 tbsp |
| Mayonnaise | 1 tbsp (optional) |
Kitchen Tools Required
| Tool |
| Musubi mold or Spam can |
| Heavy skillet or wok |
| Wire cooling rack |
| Meat mallet or rolling pin |
| Instant-read thermometer |
Step-by-Step Recipe Instructions
Step 1: Cook and Season the Rice
Rinse the sushi rice under cold water until the water runs mostly clear, about 3-4 rinses. Cook according to package directions, roughly 18-20 minutes. While it’s still hot, fold in the rice vinegar and sugar with a gentle slicing motion, don’t stir hard or the grains will turn mushy. Cover and let it cool just until warm, about 10 minutes. Chef tip: rice that’s still slightly warm presses into a mold far better than fully cooled rice.
Step 2: Prepare and Bread the Chicken
Slice the chicken breast horizontally into thin cutlets, then pound to an even 1/2-inch thickness with a mallet. Season both sides with salt and pepper. Set up three shallow bowls: flour in the first, beaten eggs in the second, panko in the third. Dredge each cutlet in flour, shaking off the excess, then egg, then press firmly into the panko so it coats evenly. Visual cue: the crust should look fully covered with no bare patches, since gaps will fry unevenly.
Step 3: Fry the Chicken Katsu
Heat about 1/2 inch of oil in a skillet to 350°F (175°C). Fry the cutlets in batches, 3-4 minutes per side, until deep golden brown and cooked through. Avoid crowding the pan, which drops the oil temperature and leads to greasy, limp breading. Transfer immediately to a wire rack, not paper towels, so steam escapes instead of softening the bottom crust.

Step 4: Make the Katsu Glaze
In a small saucepan, combine soy sauce, mirin, and ketchup. Simmer over low heat for 2-3 minutes, just until it thickens slightly and coats the back of a spoon. Common mistake: letting it boil hard, which can turn the sugars bitter, so keep the heat gentle.
Step 5: Slice the Chicken
Once the chicken has rested for a couple of minutes, slice each cutlet into strips roughly the width of your musubi mold. Slicing while it’s slightly warm, rather than piping hot, gives you cleaner cuts and keeps the crust from shattering.
Step 6: Form the Musubi
Line the musubi mold with plastic wrap for easy release. Press a layer of warm rice firmly into the bottom, about 3/4 inch thick, using even pressure so it holds together. Top with a brushed layer of glaze, then a strip of chicken katsu, then a final light drizzle of glaze. Visual cue: the rice should look compact and slightly glossy, not crumbly.
Step 7: Wrap and Serve
Unmold the rice-and-chicken stack onto a half sheet of nori. Wrap the nori around the musubi like a belt, sealing the edge with a dab of water or a smear of the reserved mayo. Serve immediately while the chicken is still warm and crisp, or wrap tightly for later.
Recipe Success Hacks
Speed Hacks
- Slice the chicken breast into thin, even cutlets before breading; thinner pieces fry through in under five minutes.
- Cook your rice in the morning or the night before, then keep it warm; you’ll skip nearly 20 minutes of waiting.
- Set up a bread station with flour, egg wash, and panko in that order so you’re not hunting for bowls mid-recipe.
Budget Hacks
- Use chicken thighs instead of breast; they’re usually cheaper and stay juicier even if slightly overcooked.
- Buy panko in bulk bags rather than small boxes, it’s noticeably cheaper per ounce and keeps well in the pantry.
- Skip pre-toasted nori snack packs and use standard sushi nori sheets, cut down to size yourself.
Flavor Hacks
- Add a teaspoon of grated garlic to the katsu glaze for a deeper savory note without overpowering the sweetness.
- Season the panko itself with a pinch of salt and garlic powder before breading, not just the chicken.
- Brush a very thin layer of mayo on the nori before wrapping; it adds richness and helps the nori stick to the rice.
Meal Prep Hacks
- Bread a double batch of chicken and freeze the uncooked cutlets between sheets of parchment for future quick meals.
- Portion cooked rice into musubi-mold-sized blocks and refrigerate; reheat briefly before assembling.

Pro Tips & Troublshooting
Over a few more tries, I learned that timing is everything. The chicken needs to rest on a wire rack, not a paper towel, or steam gets trapped underneath and softens the crust from below. I also learned to press the rice into the mold while it’s still warm, because cold rice won’t hold its shape once you unmold it, and it crumbles instead of slicing cleanly.
The mistake I see most often, and one I made myself early on, is over-seasoning the rice. A little goes a long way here, because the chicken and the sauce are already doing a lot of the flavor work. Once I found that balance, this became the recipe I make whenever I want something that feels like a treat but doesn’t take all afternoon.
Recipe Card
| Detail | Information |
| Recipe Name | Crispy Chicken Katsu Musubi |
| Author | Chef Bisma |
| Cuisine | Japanese-Hawaiian Fusion |
| Course | Snack / Main / Lunchbox |
| Difficulty Level | Beginner-Friendly |
| Preparation Time | 25 minutes |
| Cooking Time | 20 minutes |
| Total Time | 45 minutes |
| Servings | 6 musubi |
| Calories | Approx. 310 kcal per musubi |
| Equipment | Musubi mold, skillet, wire rack, meat mallet |
| Main Ingredients | Chicken breast, panko breadcrumbs, sushi rice, nori, soy sauce, mirin |
Nutrition Information
Estimated values per musubi (1 of 6 servings):
| Nutrient | Amount |
| Calories | 310 kcal |
| Protein | 18g |
| Carbohydrates | 38g |
| Fat | 9g |
| Fiber | 1g |
| Sugar | 4g |
| Sodium | 540mg |
Serving Suggestions
Chicken katsu musubi is filling enough to stand alone, but it pairs beautifully with a light cucumber salad dressed in rice vinegar, or a simple miso soup on the side. For dipping, keep extra katsu glaze or a small bowl of spicy mayo nearby. If you’re serving it as part of a spread, edamame, pickled ginger, and a cold glass of iced barley tea round things out nicely without competing with the main flavors.
Storage and Reheating Guide
Refrigerator: Store assembled musubi wrapped tightly in plastic wrap for up to 2 days. Keep the chicken separate from the rice if you’re prepping further ahead, since the crust softens faster once assembled.
Freezer: Freeze the cooked, unglazed chicken cutlets in a single layer, then transfer to a freezer bag for up to 2 months. Rice doesn’t freeze and reheat well for this recipe, so it’s best made fresh.
Reheating: Reheat chicken in a 375°F oven or air fryer for 6-8 minutes to bring back the crunch; microwaving will leave it soft. Warm rice gently in the microwave, covered with a damp paper towel, before reassembling.
Shelf Life: Best eaten within 2 days for texture; the chicken itself keeps well frozen for up to 2 months.

FAQ
Can I use pre-cooked rotisserie chicken instead of frying my own katsu?
You can, but you’ll lose the signature crispy panko crust that defines katsu
Do I need a musubi mold to make this?
No, a clean, empty Spam can with both ends removed works as a traditional stand-in
Why did my rice fall apart when I sliced the musubi?
This usually means the rice wasn’t pressed firmly enough or was too cool when molded. Press with real pressure while the rice is still warm.
Can I make this vegetarian?
Yes, swap the chicken for a thick slice of breaded and fried tofu or eggplant, keeping the same breading process for a similar crunch.
What’s the difference between musubi and onigiri?
Onigiri is a rice ball, often triangular, sometimes with a filling inside. Musubi, in this Hawaiian style, is a rectangular block of rice topped with a protein and wrapped in nori, closer to a rice sandwich.
Can I bake the chicken instead of frying it?
Yes, bake breaded cutlets at 400°F for about 18-20 minutes, flipping halfway, and lightly spray with oil for better browning, though the crust will be slightly less crisp than frying.
Conclusion
Chicken katsu musubi is one of those recipes that looks impressive but is genuinely forgiving once you’ve made it once or twice. The first batch taught me more than any recipe card could, mostly about patience with the rice and trusting the wire rack over paper towels. If you’re making this for the first time, don’t stress over a perfectly neat mold on your first try, the flavor will already win everyone over.
I hope this becomes one of those recipes you come back to on a lazy weekend or pack for a picnic when you want something a little different from a regular sandwich. Happy cooking, and I’d love to hear how yours turns out.
Happy cooking! — Chef Bisma
Recipes that You’ll Love too: